Wednesday, October 12, 2011

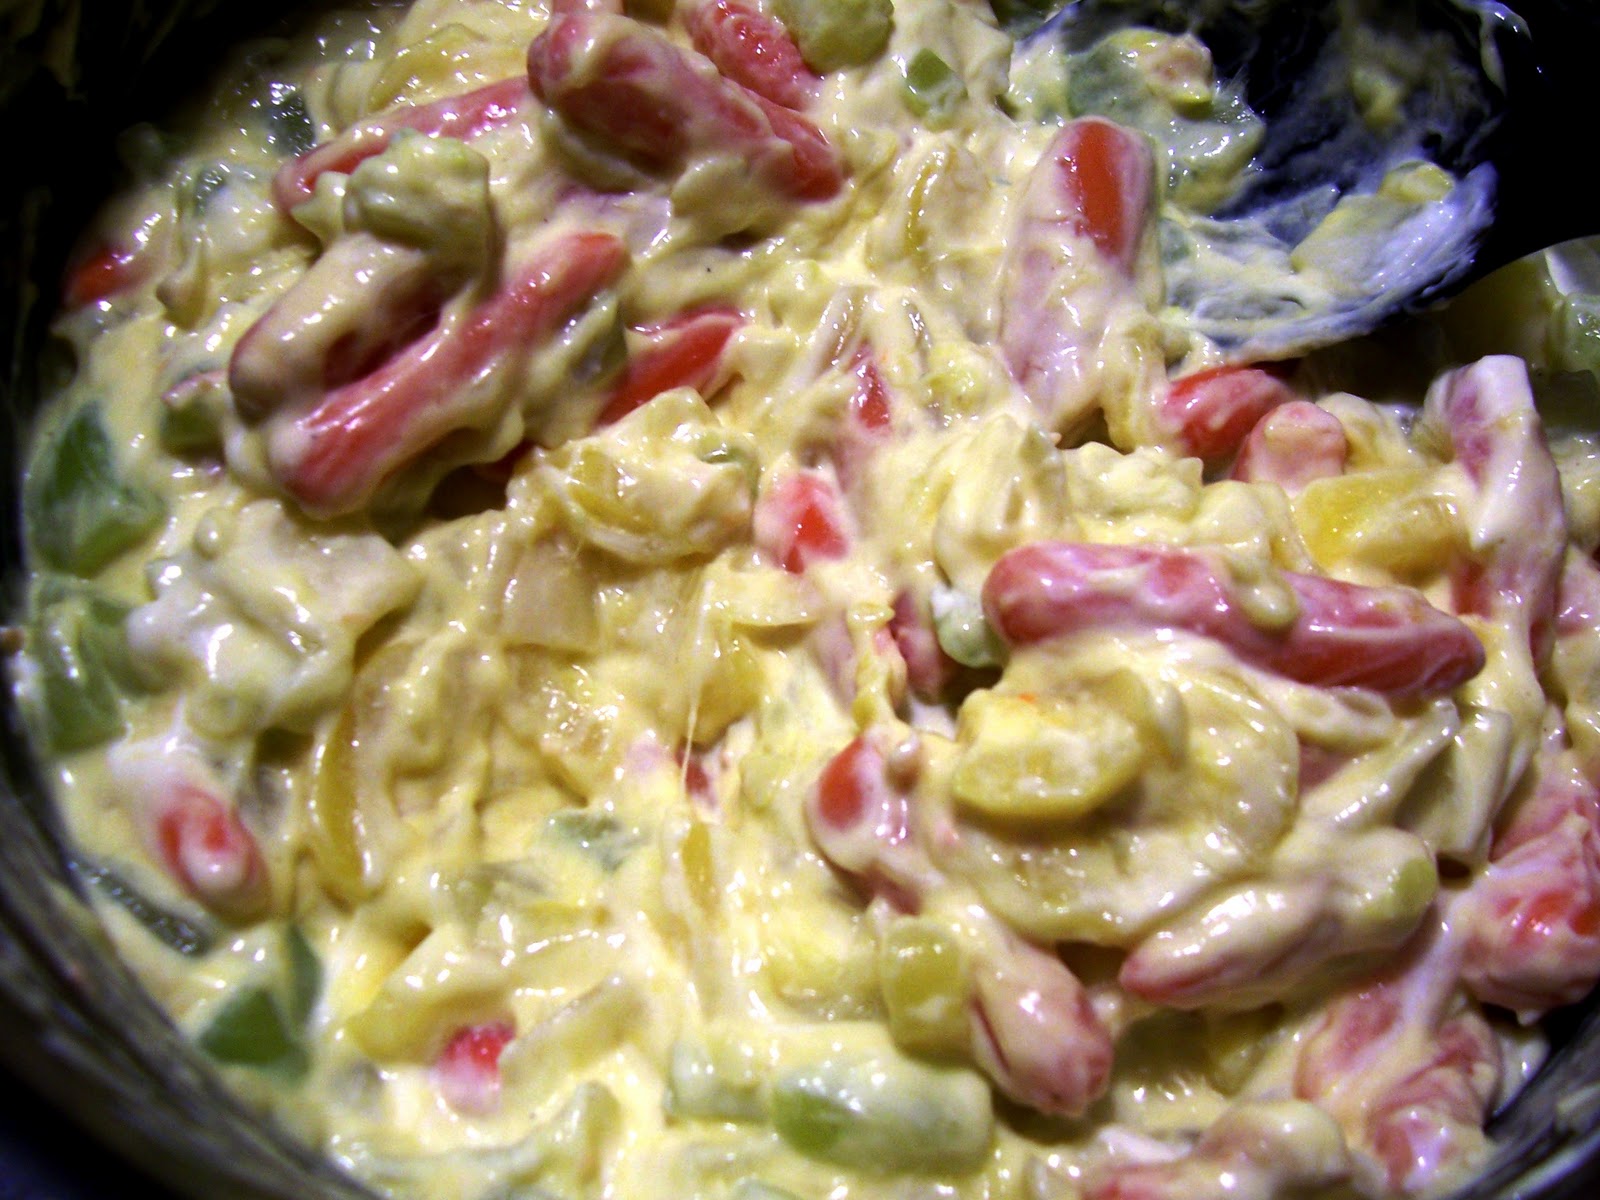
Squash Casserole


Squash, not the squash my husband likes to play with the crazy courts and rackets, but the kind that comes in about every shape possible.  When I was younger, I don't think I gave squash much of a chance.  Of course I liked pumpkin pie, pumpkin bread, and I even liked brown sugared acorn squash (who wouldn't?).  *Pumpkin is considered a squash, right?  I don't care if it isn't, it's squash-like enough for me*  But, beyond that I was a squash-hater.  Zucchini bread = plain weird in my book.  So, when my mother-in-law made up some squash casserole, I was skeptical.  Especially since it incorporated stuffing, another non-fave from childhood.  Well, I was pleasantly surprised.   Squash + stuffing + butter = love!  So, here's how I make it.

You will need:
Squash, peeled (I tend to use one zucchini and one yellow squash)
Onion
Carrots (I have used regular peeled and diced carrots, or baby carrots - yes, I can be lazy).
Cream of chicken soup
Sour Cream
Salt and Pepper
1 box stuffing mix (or you can get fancy and make your own)
1/2 cup butter or margarine


1) Start boiling a large pot of water.

2) Peel squash


2a) You can probably start pre-heating your oven now to 350 degrees.


3) Cut up carrots, squash, and onion, they don't have to be tiny, but cut them down enough that they will cook through.

3) Add vegetables to boiling water.  Boil for at least 5 minutes (I start by adding the carrots, then add in the squash and onion as I get the cut)

4) Drain water from the vegetables.


5) Add in 1 cup sour cream and cream of chicken soup.  When I was short on sour cream, I added a little bit of cream cheese which worked well.  For this batch, I added a little bit of Philly Garlic cooking creme, but I really don't think it added anything, so just skip it. 


6) Add a dash of salt and pepper to taste.


7) In a separate bowl, melt butter and toss with stuffing.


7) Spread 1/2 of stuffing mixture on the bottom of a 9x13 pan.

8) Cover stuffing mixture with squash mixture.


9) Spread/sprinkle the rest of the stuffing mixture on top.


10) Bake in oven for 30 minutes at 350 degrees.


11) Remove, cool, and enjoy!


***This is so good on its own, or served as a side dish.  Great for holiday get-togethers!

Thursday, October 6, 2011

New Bedding!

It is so windy out today I feel like the house is going to blow down!  I would love to should go outside and spray paint numbers onto the galvanized steel buckets and the milk pail I thrifted recently, but I fear I would end up with more paint on me or the house than anything else!  Oh well, maybe next week once the front moves through!  I really shouldn't complain about the wind though, I so missed it when we were living in South Carolina!  They thought 20mph winds were crazy; we have gust over 40mph right now and it's not too bad!  Ok, anyways, onto the bedding.

I shared a picture of my bedroom recently here, and if you saw it you probably noticed the lack of a bedspread/quilt/duvet/anything other than a few blankets on the bed!  Well, since we are hot-natured and it was the summer time, that was about all we needed on any particular night.  I have been toying with the idea of buying a duvet cover and a down duvet for awhile now.  I found some really reasonable prices for down duvets on Overstock.com and I fell in love with a duvet cover from Urban Outfitters, but for at least $150 total, I just couldn't justify it.  I know, bedding is important (you spend 1/3 of your day there!) and maybe I'm just cheap, but I couldn't fork it over.  So, I compromised.

Here's the duvet cover that I fell in love with:

Nevermind, they apparently don't
even have the yellow one anymore
because it was just that cool.

So, I realize the yellow wouldn't be the best math with our green chairs, but the blue version was almost as fun and had all of the colors I was looking for: blue, yellow, green, coral.


Isn't it so pretty?  Ok, so at $109 for a king size it was just too pricey.  We have a queen bed, but I thought a king size would help with cover stealing issues!  Well, luckily for me I was out estate-saling and clearance-rack-perusing and I came up with an alternative.  You know I love a good bargain.  First, I stopped at a gorgeous estate sale where there were amazing antique chairs and painting and rugs and and....  It was just such a fun house, but soooo pricey!  I ended up getting a few things including this tablecloth.  Yes, I realize a table cloth is not bedding, but it had a fun pattern and great colors and I loved it!  

But, you don't get to see it quite yet because that would ruin the surprise.  Ok, so after that fun excursion, I headed to Target and found a huge selection of bedding for 75% off!  Woohoo!  That stuff gets me EXCITED!  So, I picked up a few things (1 quilt, 1 duvet cover, 1 coverlet, 1 sheet set, about 5 throw pillows, 6 small area rugs, and I think that's it).  Ok, I knew I was going to return whatever didn't work, so I overbought things since I wanted to see how a few options looked in the house. 

Here are the quilt ($25) and duvet cover ($17.50).  I got.  I apparently forgot to take a picture of the coverlet.


I was afraid the quilt might be a little too girly for my husband, but since he liked my Urban Outfitters selection, I figured I was ok.  As for the duvet cover, I did not want the bland beige look, but thought it could be fun to dye it a nice blue tone since it was 100% cotton.  So, up next was a test run on the bed.  First up, the quilt.

I liked how calming it looked on the bed, but wanted to go through all of my options.  I didn't get the duvet cover out because the more I thought about it, the more I figured a solid duvet cover would be hard to keep wrinkle free (I am not a huge iron-er!) so, I just skipped that.  You can get an idea of how it would have looked from this old picture with just our sheets (or you might have seen it while I was rearranging furniture, here), which are nearly the same color, even though I would have dyed the duvet cover.

Forgive the mess!  It was cold the night before, so I have quite the assortment of blankets out!
Up next was the coverlet.  And, here is your first glance at the estate sale tablecloth I mentioned.

This one looked ok, but I was not sold.  I didn't totally love the stripes, and when I got under it, it was just too hot (the filling was polyester, so it didn't breathe well).  And, it didn't work very well with my new tablecloth end-of-the-bed-throw.


Even though the coverlet was a king size and the quilt was just a full/queen, the quilt won out.  It blended in so nicely with the tablecloth, which in turn blended in great with my velvet green chairs on the other side of the room.


Now, I kept trying different pillow arrangements trying to get that magazine spread look, but it's harder than it seems!  I didn't like the dark blue, so I took that out.  And got the following:


 Then I thought the pink wasn't totally working so I took that out and ended up with this:


And I like it!  I made those small pillow covers myself and I think they pull everything together including the quilt, tablecloth, and green velvet chairs (their usual home).  Now, to figure out what to do with those curtains.  Up next, the sheet set I bought.  Since upgrading to a queen size mattress, we haven't had a spare sheet set, so I got these on sale at Target (on top of a 20% off coupon), for about $40.  I bought a higher thread count sheet set from Target previously and we fell in love with the softness compared to those cheapy Walmart sheets and I figured 20 bucks off was a pretty good deal for the set.  I wanted something to go with the quilt, but not match outright, so I went with a damask sheet set.  Here they are with one of my pillows and the tablecloth on top of the quilt so you can get and idea of how they go together.  I'm liking it.


Next up, an awesome rug that I had been looking at every time I passed the Target rug aisle.  It was smaller than the one I wanted, but since it was 75% off, I thought I would at least give it a try to see if it worked in the room.  Sadly, it didn't.  :(  Oh well, I brought it back to Target so someone else can enjoy it.  It was just too dark/rust colored to go with the pinky coral I had going on.


Here's a close up so you can see that, though beautiful, it really doesn't work at all.


I even tried it down in our basement, but it still didn't quite work.


So, back to Target it went.  Now, I've got the bedding down, but I'm still working on a paint color for our bedroom.  I had originally wanted a grey, but now that the quilt is on our bed, I'm not sure it works.  I had originally chosen the colors because they went with our natural wood trim, specifically the bottom right color was the front runner (Pebble by Glidden).  But, now it just seems like its too close to the bedspread color and just isn't working.  I'm thinking maybe one of the darker grays on the top right paint card (third from bottom) but I'm afraid it will be too dark!  I should probably just get a sample, slap it on the walls and see, the worst that can happen is I hate it and have to paint over it, right?  Or maybe I'll just paint a huge canvas in that color and move it around to see what it looks like in different parts of the room (a tip I learned from www.mariakillam.com I believe, she has some great insights on color!).  Well, at least the room is evolving, even if it is ever so slowly!  Anyone out there jumping on the grey bandwagon?  So far, I've just spray painted a few accessories the "trendy" color.  Ok, now enough procrastinating.  I'm off to finish my online accounting class videos for the week!


Monday, October 3, 2011

Crock pot roast

There really is nothing better than coming home to a house full of the wonderful aroma from a roast (well, maybe not nothing).  It is one of my all time favorite meals, and it is so simple and delicious!  Here's how I make it.

You will need:
Crockpot
Beef roast (you can substitute a pork, turkey, or chicken roast)
Carrots
Onions
Celery - optional
Potatoes
Salt
Pepper (I use a seasoned pepper blend by McCormick - but it is quickly running out and I can't find more anywhere!)
Onion Powder - optional
Cornstarch (for gravy)

All you have to do is cut up the vegetable into chunks, size is up to you (I like to leave my onion chunks together rather than breaking them up - it makes them easier to find and enjoy later).  If you are short on cooking time, smaller chunks are better - they'll soften up quicker.

Next, place some veggies into the bottom of your crockpot, add meat, sprinkle meat with seasonings (salt, pepper, onion powder, and whatever else you feel like).  Finish adding your veggies around and on top of the roast.  Now pour in some water.  The amount of water you use is really based on preference, I usually like to cover all of my vegetables to make sure they all cook up nicely (usually I place my meat so it is still poking through the top of the vegetables and water).


Sprinkle the top of your veggies/roast with more seasoning, then let that baby (that just sounds bad) cook as long as possible!  Use the lowest setting and just leave it be.  I have one crock pot that has a timer and another that just has a low/high setting.  For the timer, I usually use the 8 hour, though 10 is best; for the other one I use the lowest setting and let it cook for at least 8 hours.  If you go for a shorter cooking time, it will still taste good, but won't be nearly as tender.


Ok, you've waited and waited and finally the time has come to enjoy your roast.  But I don't feel a roast is truly complete without GRAVY!  It is so simple to make and oh so good poured over your entire plate.  First, ladle out some of the liquid (I guess you could call it "stock") from your roast (as much or as little as you want).  If you don't have enough, get as much as possible from your roast, then just add some water.  You can add in more seasonings here (I usually add at least a little salt and pepper).  Place the liquid in a pan and heat it until it boils.


Now for the fun.  Get out the cornstarch, place a spoonful or two in a cup.  Add in about the same amount of COLD water.  Stir until everything is a nice smooth milky looking liquid.  Get a whisk and start whisking away on your boiling pot of stock.  Slowly add in the cornstarch mixer while continuing to whisk.  Once you have added and mixed in all of the cornstarch mixer, stop whisking and wait about 30 seconds to see how thick your gravy gets.
*If it is still too runny, just repeat the steps with the cornstarch (you can try adding less water to the cornstarch - but be careful, if you use too little water, when the cornstarch hits the stock it might just ball up and you'll have little white chunks floating around).
*If you discover your gravy is too thick, you can try adding in some plain water.
*This works for each kind of meat, but I don't think I would want to taste pork gravy...


Now, place your meat and veggies on your plate, smother with gravy, and enjoy!


*Yes, I did finish everything on my plate, and I believe I went back for more...

Leftovers are great reheated on their own, or add some barbecue sauce to your meat and have bbq sandwiches.

Chicken with Feta

I feel like my camera is bursting with photos for future posts.  I figured I should get started with a quick, yummy one!  I tend to look at what ingredients I have in the fridge/pantry, decide what I want to use, google around to see if there are any recipes with these ingredients, then put my own twist on it.  So, what I really wanted to use was my feta cheese (I got for $1 a package on sale with coupon!!!) and chicken.  I found a recipe that used balsamic vinegar, and another that used a spritz of lemon juice.  Here's what I decided to work with:


Pretty easy starting point:
Chicken tenders
Lemon Juice
Feta Cheese
Italian Seasoning
Balsamic Vinegar
***And, some sliced tomatoes that had already been used when I took this picture.

I lined a pan with foil (easy clean up!), put in the chicken, then poured on some balsamic vinegar.  Next, I sprinkled on some of the Italian seasoning. 

After this, place under broiler for 10-15 minutes.

Next came some sliced tomatoes, and a bit of feta cheese.  I think I added a drizzle of lemon juice after this (I might have put it on right after the balsamic, but I can't remember).  Broil for another 2-5 minutes, or until thoroughly cooked.  Enjoy!

*Yes, my pictures probably don't do it justice.  It was quite tasty!


Tuesday, September 20, 2011

House before and afters

Well, I haven't been posting as much as I had planned.  Maybe because of my newly acquired responsibility of studying for my accounting class.  Yep, couldn't stay away from school.  First test is tomorrow, which I am optimistic about, just need to study a bit more later on today.  Now seemed like a good time to take a break though!

Here are a few before and afters of our house compared to when we first bought it, along with what exactly we did.

Here is the floors of our house when we got them - looking a little thirsty.

Ignore the dates, I apparently didn't update my camera.

What we did was first combine a light and dark Old English (a few drops of the dark in with quite a bit of the lighter stuff), then go over all of the floors.  This took quite a while to dry (3+ days), and we had to wipe up some excess.  After that we mopped on SC Johnson's One Step No Buff Wax.  More than a year later, the floors are still looking good (much less thirsty than before) with minimum upkeep.


Don't they look so much better all nice and shiny?

Our next big project was taking down the wall paper in our now office.  As we scraped and scraped I believe we uncovered 3-4 layers of wallpaper!  We started out just using a metal putty knife, and made fairly good progress with it (especially on the outer walls), but it wasn't going to be enough.


Below is about how much progress we made by just scraping it down.


So, we headed to Walmart and bought DIF wallpaper remover gel and a paper scraper.


These two made it a whole lot easier to rip into that wallpaper.  Once we had everything scraped, and had wiped down the walls with a little water (might have used a mild soap too, not remembering now), we decided to use Kilz primer to hopefully block out any stains that could come through the paint later from leftover wallpaper glue (it's worked so far!).  Here's a photo of the difference between the bare wall and what got covered with the primer.


Before all the priming went on, we had some problem to deal with.  A few big cracks and a ton of tiny ones!  We didn't want to have all of those showing through our paint at the end, so we bought some plaster (our walls are plaster to begin with).  We filled in holes and lightly went over the areas with the smaller cracks.  Then came the fun part, Matt got in there with a sander and heavy duty mask (approved for plaster particles/lead paint remnants, just in case) and he sand down everything so we would have a nice smooth wall.  One of the walls in our hallway is fairly wavy, so we really wanted to make sure everything was nice and smooth.  Here's a view of the room all plastered and primed, just waiting for a new coat of paint.


No, we don't trust ourselves enough to not get paint on our floor so we covered everything with a plastic tarp.  When choosing a color, I wanted something that would work with the wood trim (it really adds character to the house and I don't think even I could paint it white, and my husband definitely wouldn't allow it!).  The living area was already painted a golden hue, Walmart's ____ Honey, which I would not recommend solely based on the quality of the paint, not the color.  (ps - this was our first paint job, so we just went with what was cheap, but had to use 3 coats and kept running into trouble with clumping and poor coverage)  The color looks really nice with the wood.  Anyways, I brought the honey color ship along with me when choosing what color we should use for the office and decided on Kilz Herb Tea.  What could go better with Honey than Tea?  We really wanted to make sure nothing would come through, hence the use of primer and Kilz paint on top of that.  Here's what it ended up looking like on our walls.  One coat covered pretty well, but we had a few little areas that needed touched up, so we just used another coat over all of it.  


I was afraid it was a little dark, but I really like the way it looks with the wood trim.  This was taken just after we had shined up the floors (this was one of the last rooms we did that in).  Just need to figure out how to put the rest of the room together now!  We have a desk/bookcase in there, along with the piano we inherited with the house, but it's pretty messy right now, so a total after shot will have to wait!

Ok, I feel like this post is getting too long, so I'll save the laundry room/stairs/basement for another day!  Now, back to studying!