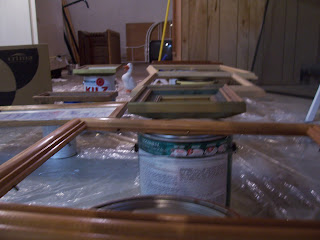
I layed them all out on various paint cans we had around. I learned leaving things on a not so clean tarp in the basement is a good way to invite dirt onto your stuff when I was painting some shelves earlier this summer.
I just took which ever frame I was painting, painted all of it (well, not the back) except for the small place I had to hold on to it, then placed it back on its spot to cover that little spot and let it dry.
I knew sanding them down and using some oil based primer would give me the best results, but I was feeling like experimenting (or maybe you can call it lazy). Anyway, all I did was put on three thin coats of Benjamin Moore's Decorator's White in semi-gloss. I have used this same gallon of paint for quite a few projects, like painting a door frame in the bathroom and turning old auction finds including a small dresser for my closet, bookshelves, and microwave cart into crisp white storage for the office, and now these picture frames. The great thing is I haven't even used a third of the paint! I was worried when I bought it (it cost about $40), but since it has lasted so long already and done a great job with coverage, it was a good buy! So, back to the frames. I could tell all of them would need another coat after I applied the first one. So, I let them dry over night and then added another coat. Things were still looking iffy and I was wondering if my "experiment" was going to work out. So, a few days later I decided to try one more coat. Voila! Nice crisp white frames. I like that they are all different shapes and sizes, but are the same white to make them go together.
Now all I had to decide was where to hang them. I had originally planned to hang them in the hallway leading to our bedroom, but we still have to paint up there and I didn't want to have to hang them, take them down to paint, then rehang them again. When my husband said something about how I was probably annoyed one of the walls in our living room was bare, I knew that was the spot. I laid out the frames on the floor first to see how I could arrange them.
At first, I liked the following arrangement best. But as I got to thinking about it, I thought the mirror (the one in the top left corner) would be reflecting too much stuff if put in that placement since it would be opposite of out built in dining room hutch.
So, the next thing I did was make a mirror image of the frames, swapping the ones on the outsides. Now I figured the mirror would just reflect the wall.
As for hanging all of the frames, I used picture hanging Command strips. Since we have plaster walls, I am very leery of actually putting any nails through the wall because of the mess it takes to patch them. We had to patch a bunch of places in our office after we took down the 4 layers of wallpaper, which we did by plastering the cracks and crevices, waiting for it to dry, then sealing off the room while my husband donned a heavy duty mask and sander to sand things down and make them smooth. Not something we want to go through again!
I know a lot of people will take the time to cut out pieces of newspaper to the same dimensions of their frames and tape them up in order to make sure they like that placement, but since I started this project out with
The next task was to put up the strips. What you do is put the strips on the frame first, place the frame where you want it, then lift up on the frame so that one part of the velcro-type fastener is stuck on the wall, while the other part is still on your frame. In order to make things level, I just sort of balanced a leveler on top of my frame as I went. You could probably draw a line with the leveler or try all other kinds of better ideas, but this project was all about experimenting! Here's what it looked like after I had put all of the strips up.
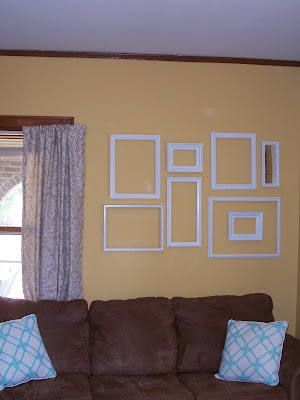
I believe that little shiny spot is an attempt to cover a hole or missed spot while painting. I have since learned it is best to add a little water to your paint before trying any touch-ups, and feathering the paint out so it's not so obvious. Lesson learned. Ok, so here's the big reveal. The following two pictures capture our living and dining room paint color the most accurately. I think it was called honey and it was Walmart Color place paint (NOT a brand I would recommend), but the color goes well with our wood trim, which my husband has made clear won't be painted. Because of the age of the house, I really kind of like the natural wood trim. It just makes decorating harder.
I can't tell you how much it is bugging me how the curtains are hung. If only I had learned the "high and wide" principal before we my husband spent hours drilling into the very hard frames, we might have saved some frustration. Hopefully I will get to them soon, but that's a project for another day.
Are you a fan of the empty frame look? Or do you think it's totally weird (as did my husband before I put them up. "Aren't you going to put anything in them??"). I think it turned out well! The only thing I really want to change is to move the bottom left frame a few more inches away from the frame to the right of it. Then this part of the wall should be done!


Looks great!
ReplyDelete